Looking to enhance your outdoor space? Low voltage outdoor lighting can make a big difference.
It’s safe, energy-efficient, and easy to install. Low voltage outdoor lighting can transform your garden, patio, or pathway. It highlights key features, adds ambiance, and improves safety. Unlike traditional high voltage lighting, it uses less electricity and is safer to handle.
This makes it perfect for DIY enthusiasts. In this guide, you’ll learn everything you need to know about installing low voltage outdoor lighting. From choosing the right fixtures to understanding the basic wiring, we’ll cover it all. Get ready to brighten up your outdoor areas with ease and style.
Credit: blog.1000bulbs.com
How to Low Voltage Outdoor Lighting
Benefits Of Low Voltage Lighting
Low voltage outdoor lighting offers many benefits for your home and garden. These lights not only enhance the beauty of your space but also provide practical advantages. Let’s explore the key benefits of low voltage lighting.
Energy Efficiency
Low voltage lights consume less power than traditional lighting options. They use LED bulbs, which are known for their energy-saving capabilities. This means lower electricity bills and a smaller carbon footprint. Efficient energy use is both eco-friendly and cost-effective.
Enhanced Safety
Low voltage lighting is safer to install and operate. It reduces the risk of electrical shocks and fires. The lower voltage also means less heat emission, which is safer for children and pets. You can place these lights in various outdoor settings without worrying about safety hazards.
Planning Your Lighting Design
Planning your outdoor lighting design is crucial. Proper planning ensures that your low voltage lighting setup is both functional and beautiful. This section will guide you through the essential steps to create an effective lighting plan for your outdoor space.
Assessing Your Space
Start by assessing your space. Walk around your outdoor area during the day and night. Take note of dark spots, pathways, and key features. Consider how you use the space. Do you entertain guests? Do you need to light pathways for safety? Understanding your needs is vital.
Create a map of your yard. Sketch out the main areas, such as the garden, patio, and walkways. Mark any existing lighting and electrical outlets. This helps visualize where new lights can be placed.
Consider the following points:
- Size of the area
- Existing lighting
- Power sources
- Key features and pathways
Choosing Focal Points
Next, choose focal points. These are the areas you want to highlight with lighting. Focal points can include trees, statues, water features, or architectural elements. Highlighting focal points adds depth and interest to your outdoor space.
Think about the following:
- Which features are most attractive?
- Which areas need more visibility?
- How can light enhance the space?
Create a balance between focal points and general lighting. Too much focus on one area can overshadow others. Spread the light evenly to create harmony.
Use different types of lights for varying effects. Spotlights can highlight specific features. Path lights can illuminate walkways. String lights add ambiance to seating areas.
| Lighting Type | Purpose |
|---|---|
| Spotlights | Highlight specific features |
| Path lights | Illuminate walkways |
| String lights | Add ambiance |
Proper planning ensures a well-lit, inviting outdoor space. Assess your space and choose focal points to create a beautiful lighting design.
Selecting The Right Fixtures
Choosing the right fixtures for low voltage outdoor lighting can transform your garden or yard. It is important to pick fixtures that suit your needs and preferences. Proper selection ensures not only aesthetic appeal but also durability and efficiency. Let’s explore the different types of fixtures and weather-resistant options available.
Types Of Fixtures
There are various types of fixtures to consider for your outdoor lighting:
- Path Lights: Ideal for illuminating walkways and garden paths.
- Spotlights: Perfect for highlighting trees, plants, or architectural features.
- Wall Lights: Useful for lighting up walls, fences, and doorways.
- Well Lights: Discreet fixtures that are embedded in the ground to highlight plants and trees from below.
- Deck Lights: Specifically designed for illuminating decks and stairs, ensuring safety and ambiance.
Weather-resistant Options
Outdoor lighting fixtures must withstand different weather conditions. Here are some weather-resistant options:
| Material | Benefits |
|---|---|
| Stainless Steel | Resists rust and corrosion, ideal for wet climates. |
| Brass | Durable and develops a natural patina over time, giving it a classic look. |
| Aluminum | Lightweight and affordable, often coated to resist weather. |
| Polycarbonate | Impact-resistant and does not corrode, good for harsh environments. |
Selecting the right fixtures is essential for creating an inviting and secure outdoor space. Consider the types of fixtures and their weather-resistant options to ensure longevity and beauty in your lighting setup.
Credit: www.carolights.com
Installation Process
Low voltage outdoor lighting is a great way to enhance the beauty and security of your home. The installation process is straightforward and can be completed in a few hours. By following these steps, you can ensure your lights are installed properly and efficiently.
Necessary Tools
Before you start, gather all the necessary tools. Having everything on hand will make the installation smoother.
- Screwdriver
- Wire cutters
- Wire strippers
- Drill with bits
- Measuring tape
- Voltage tester
- Shovel
Step-by-step Guide
-
Plan your layout. Decide where you want to place your lights. Measure the distance between each light and the power source.
-
Install the transformer. Mount the transformer near an outdoor outlet. Ensure it is high enough to avoid water.
-
Lay out the cables. Run the low voltage cable from the transformer to the light fixtures. Leave some slack to adjust the lights later.
-
Connect the lights. Attach the wires from the light fixtures to the low voltage cable. Use wire connectors to secure the connections.
-
Test the system. Plug in the transformer and turn it on. Use a voltage tester to check the connections and ensure everything works.
-
Bury the cables. Use a shovel to create a shallow trench. Place the cables in the trench and cover them with soil.
-
Adjust the lights. Position the lights to highlight the features you want to illuminate. Make final adjustments to the light angles.
Wiring And Connections
Wiring and connections are crucial in low voltage outdoor lighting. Proper wiring ensures safety and long-term functionality. Incorrect connections can lead to short circuits or power loss. This section will guide you through the essentials.
Safety Tips
Always switch off the power before starting. Wear insulated gloves. Use a voltage tester to ensure the power is off. Keep connections dry and away from water sources. Use waterproof connectors for added protection. Follow the manufacturer’s instructions carefully.
Avoiding Common Mistakes
Avoid using undersized wires; they can overheat. Don’t mix different wire types. Ensure all connections are secure. Loose connections can cause flickering lights. Avoid running wires in high-traffic areas. Use conduit to protect wires. Double-check polarity to avoid damage.
Maintaining Your Lighting System
Proper maintenance of your low voltage outdoor lighting ensures they last longer and stay bright. Regular upkeep can prevent most common issues and keep your system efficient. Below are some essential steps to keep your lights in top shape.
Routine Checks
Conducting routine checks is crucial. Inspect your system monthly to spot any problems early. Here are a few steps to follow:
- Examine all light fixtures for damage or dirt.
- Check the wiring for signs of wear or exposure.
- Ensure the transformer is functioning correctly.
Cleaning the fixtures is also important. Use a soft cloth and mild soap to remove dirt. This maintains the brightness and efficiency of your lights.
Troubleshooting Issues
Even with regular checks, issues can arise. Here is a simple guide to troubleshooting common problems:
| Problem | Possible Cause | Solution |
|---|---|---|
| Lights not turning on | Loose connections or power issues | Check and secure all connections. Ensure transformer is plugged in. |
| Flickering lights | Voltage drop or faulty bulbs | Replace bulbs. Check voltage levels. |
| Dim lights | Dirty lenses or low voltage | Clean lenses. Check transformer settings. |
For more complex problems, consult a professional. They can provide expert solutions and ensure your system is safe.
Creative Lighting Ideas
Creative lighting ideas can transform your outdoor space into a magical oasis. Low voltage outdoor lighting offers flexibility and safety. Let’s explore some creative ways to enhance your garden, pathway, or yard.
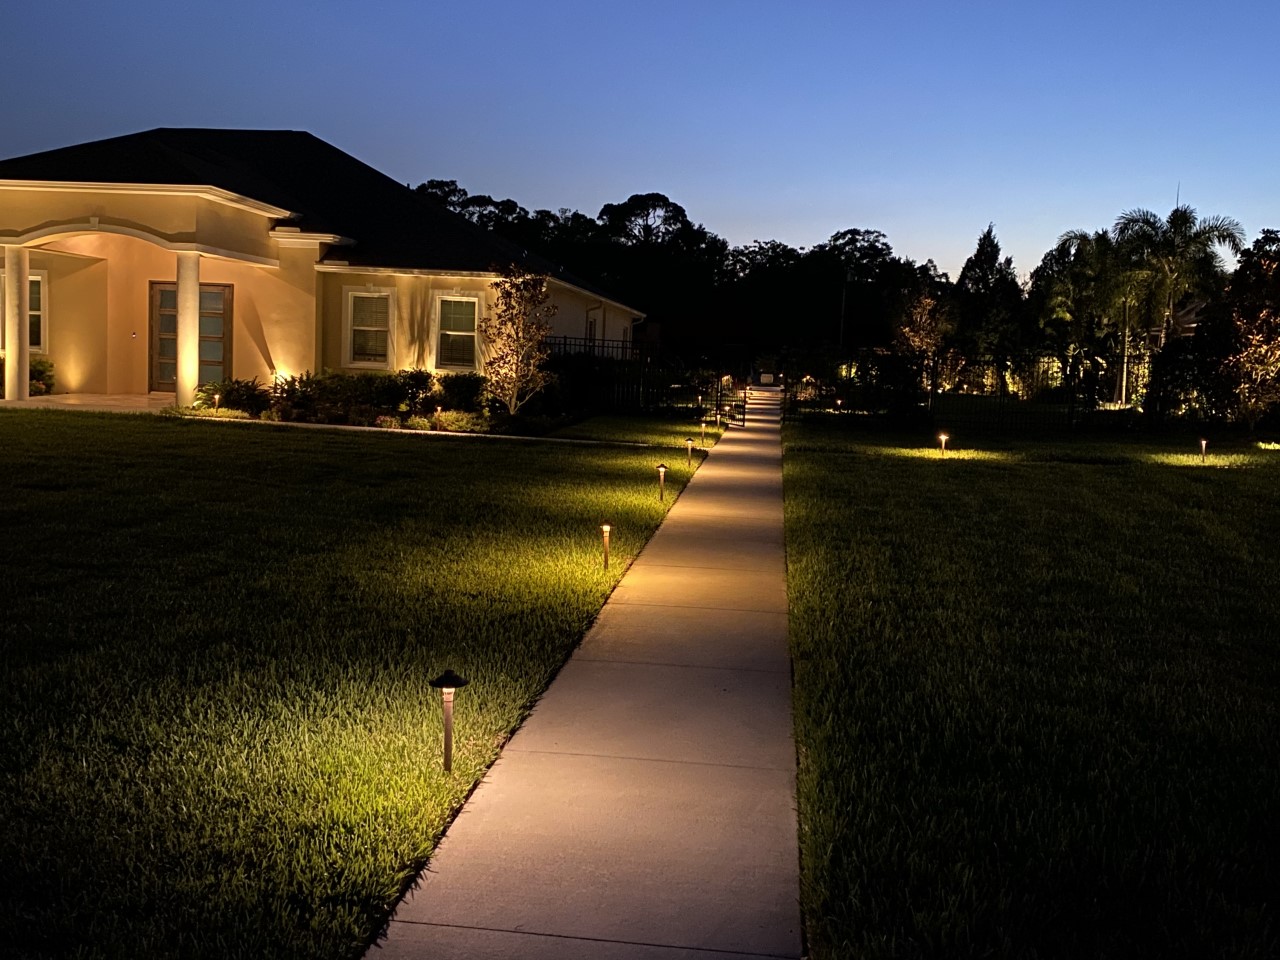
Pathway Illumination
Pathway lighting improves safety and adds charm to your garden. Use low voltage lights to create a welcoming glow. Place lights along the edges of the path for even illumination. Solar-powered lights are energy-efficient and easy to install. Choose a design that complements your outdoor decor.
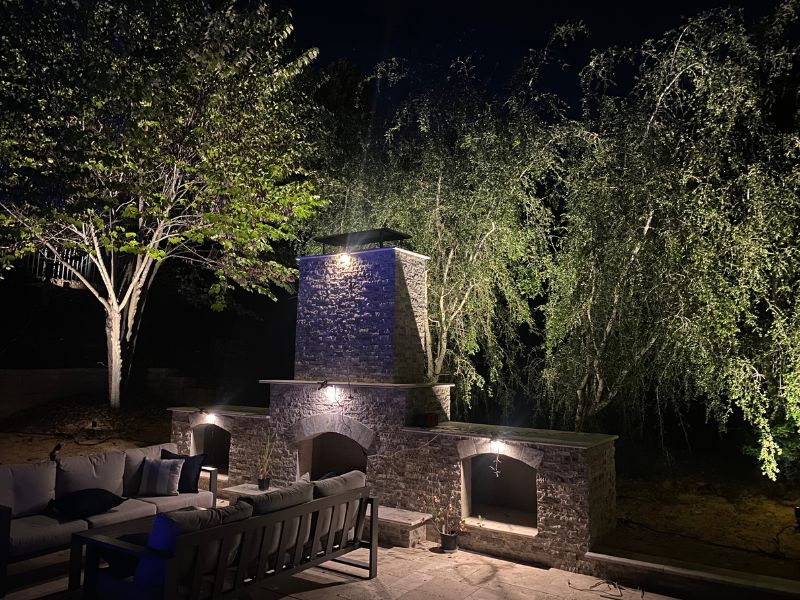
Accent Lighting
Accent lighting highlights specific features in your garden. Use spotlights to draw attention to trees, statues, or fountains. Soft, warm lights create a cozy atmosphere. Experiment with different angles to find the perfect look. Low voltage accent lights are safe and energy-saving.

Credit: www.borstlandscape.com
Frequently Asked Questions
What Is Low Voltage Outdoor Lighting?
Low voltage outdoor lighting uses a transformer to reduce standard voltage. It is safer and energy-efficient.
How Do I Install Low Voltage Outdoor Lights?
Plan your layout, connect the transformer, and place the fixtures. Follow safety instructions.
What Are The Benefits Of Low Voltage Lighting?
It is safer, uses less electricity, and is easier to install. Ideal for landscapes.
Can I Use Led Bulbs With Low Voltage Lighting?
Yes, LED bulbs work well with low voltage systems. They are energy-efficient and long-lasting.
How Do I Maintain Low Voltage Outdoor Lighting?
Check connections, clean fixtures, and replace bulbs as needed. Regular maintenance ensures proper function.
Conclusion
Creating low voltage outdoor lighting is simpler than it seems. Follow the steps, and your outdoor space will shine. Save energy, add safety, and boost your home’s look. Choose the right lights and install them correctly. Enjoy a beautiful, well-lit yard every evening.
With these tips, your outdoor lighting project will succeed. Happy lighting!

My name is Mahi Uddin, and I’m a blog writer with over two years of experience specializing in creating engaging, informative content using AI tools. I contribute to InExDecor.com, where I share creative ideas and practical tips for transforming interior and exterior spaces into beautiful, functional environments. With a passion for storytelling and a knack for blending creativity with technology, I strive to craft blogs that not only inform but also inspire readers. When I’m not writing, you can find me exploring design trends or enjoying a good book with a cup of coffee.