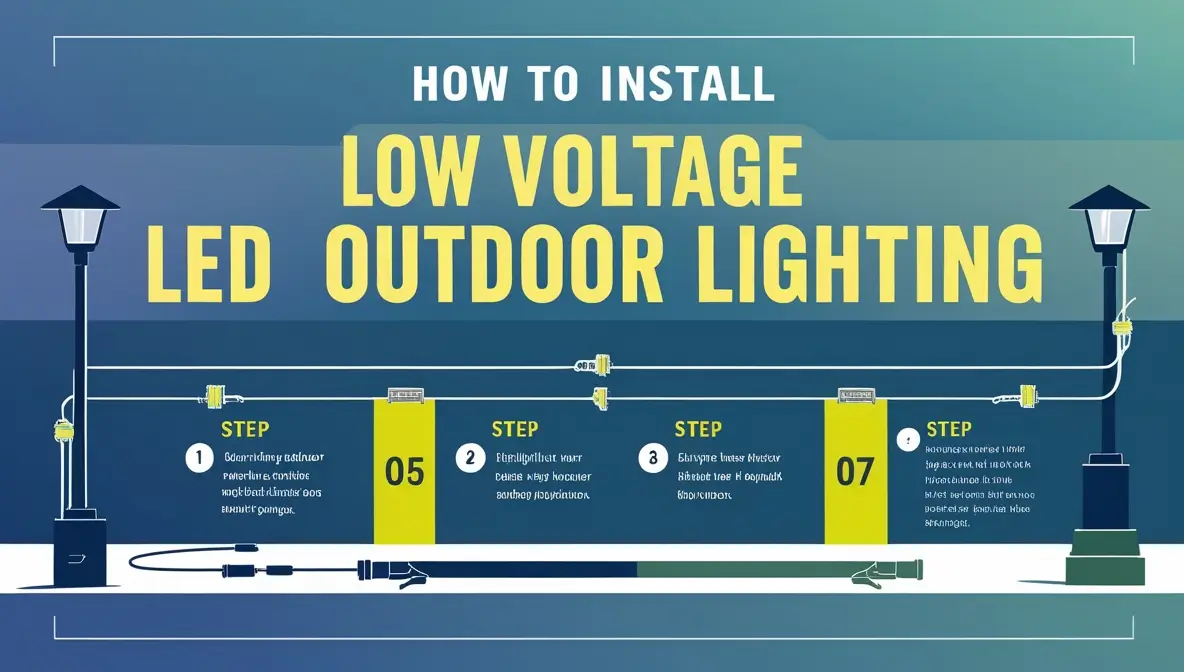
How to Install Low Voltage Led Outdoor Lighting? Want to beautify your outdoor space with low voltage LED lights? It’s easier than you might think.
Installing low voltage LED outdoor lighting can transform your yard, garden, or patio into a stunning nighttime oasis. These lights not only enhance the beauty of your home but also improve safety. In this guide, you’ll learn step-by-step how to install these lights yourself.
Low voltage LED lights are energy-efficient and cost-effective. They provide excellent illumination without a hefty electricity bill. Whether you’re a DIY enthusiast or a beginner, this installation process is simple to follow. By the end of this blog, you’ll have the knowledge and confidence to light up your outdoor space beautifully and efficiently. Let’s get started!
Introduction To Low Voltage Led Outdoor Lighting
Low voltage LED outdoor lighting is a popular choice for homeowners. It enhances the beauty of outdoor spaces. It also adds security and functionality to your yard.
This type of lighting uses less electricity. It is safer to install and use. The lights are durable and have a long lifespan. Let’s explore the benefits and applications of low voltage LED outdoor lighting.
Benefits Of Low Voltage Lighting
Low voltage lighting is energy efficient. It uses less power than traditional lighting. This results in lower energy bills.
It is safe to install and use. The risk of electric shock is minimal. It is perfect for outdoor installations where safety is a concern.
The lights last longer. LED bulbs have a lifespan of up to 50,000 hours. This reduces the need for frequent replacements.
Low voltage lighting is environmentally friendly. It produces less heat and reduces the carbon footprint.
Applications Of Led Outdoor Lighting
LED outdoor lighting is versatile. It can be used in many areas of your yard.
Pathway lights are common. They illuminate walkways and driveways. This makes it safer to walk at night.
Landscape lighting is another application. It highlights the beauty of your garden. It can be used to accentuate trees, plants, and water features.
Deck and patio lighting creates a cozy ambiance. It allows you to enjoy outdoor spaces after dark.
Security lighting is crucial. It deters intruders and increases safety. Motion sensor lights are a great choice for this purpose.
Planning Your Outdoor Lighting
Installing low voltage LED outdoor lighting can transform your yard into a beautiful and safe space.
Before you start, plan your lighting setup carefully. This will save time and ensure you achieve the desired effect.
Assessing Your Outdoor Space
Start by evaluating your outdoor space. Look at the areas where you need lighting the most.
- Pathways
- Gardens
- Patios
- Driveways
- Entrances
Make note of any obstacles or features that might affect your lighting plan.
Trees, bushes, and walls can impact where lights should be placed.
Designing The Lighting Layout
Draw a simple map of your yard. Mark the important areas you identified earlier. This will help you visualize where to place your lights.
Consider the type of lighting you need for each area:
| Area | Lighting Type |
|---|---|
| Pathways | Path Lights |
| Gardens | Spotlights |
| Patios | Deck Lights |
| Driveways | Flood Lights |
| Entrances | Wall Lights |
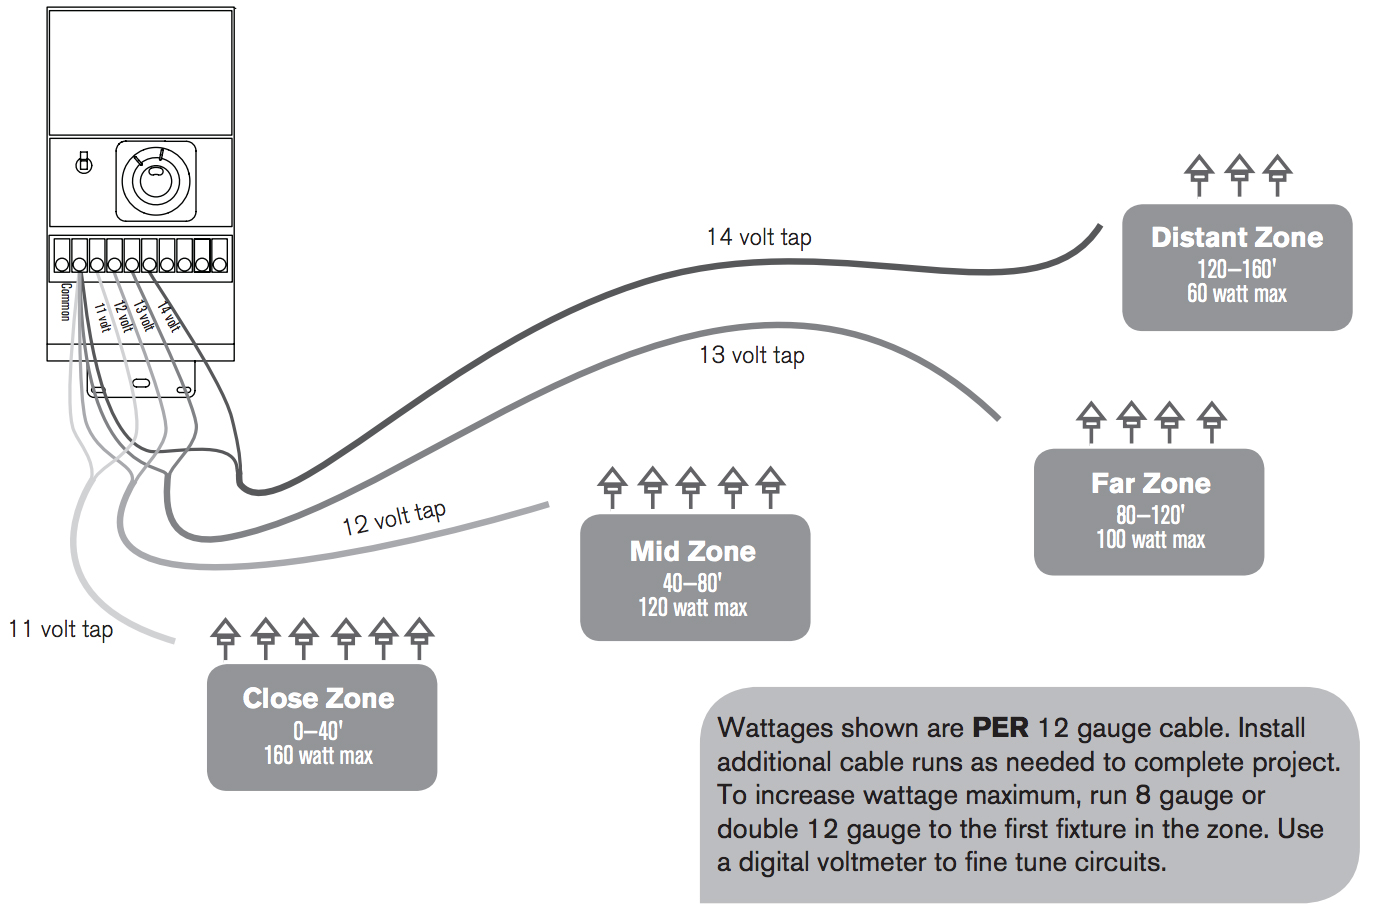
Plan the power source. Low voltage lighting requires a transformer. Choose a location close to an outdoor outlet.
- Install the transformer
- Run cables to each light location
- Connect the lights
Make sure the cables are hidden to avoid tripping hazards. Use waterproof connectors to prevent damage.
Gathering Necessary Tools And Materials
Before you start installing low voltage LED outdoor lighting, make sure you have all the necessary tools and materials. Proper preparation ensures a smooth installation process and better results. Below is a detailed list of essential tools and required lighting components.
Essential Tools List
- Screwdriver: Both Phillips and flathead types.
- Wire Strippers: For removing the insulation from wires.
- Pliers: Useful for gripping and bending wires.
- Tape Measure: To measure distances accurately.
- Utility Knife: Handy for cutting wires and materials.
- Drill: For making holes in walls or fences.
- Shovel: For digging trenches to lay wires.
- Level: To ensure your lights are straight.
- Voltage Tester: To check the electrical connections.
Required Lighting Components
| Component | Description |
|---|---|
| LED Lights | Choose energy-efficient, durable LED lights for outdoor use. |
| Low Voltage Transformer | Converts standard voltage to low voltage suitable for LED lights. |
| Wire Connectors | Connect wires securely and safely. |
| Low Voltage Cables | Special cables designed for outdoor use and low voltage. |
| Mounting Stakes/Brackets | Used to mount or secure lights in place. |
| Timer or Photocell Sensor | Automate the lighting system for convenience. |

Credit: www.voltlighting.com
Preparing The Installation Area
Installing low voltage LED outdoor lighting can transform your garden. It enhances both beauty and safety. The first step is preparing the installation area. This step ensures a smooth and efficient installation process.
Clearing The Installation Site
Begin by clearing the area where you plan to install the lights. Remove any debris, leaves, or branches. Trim overgrown plants that might obstruct the light. Ensure the ground is even and stable. This will help you place the lights securely.
Marking The Lighting Positions
Next, decide where you want to place each light. Use stakes or small flags to mark these positions. Ensure each light has enough space to shine without obstruction. Consider the overall design and purpose of the lighting. Make sure the positions create a balanced and pleasing effect.
Installing The Transformer
Installing a transformer for your low voltage LED outdoor lighting is a crucial step. It ensures your lights function safely and efficiently. This section will guide you through the process of installing the transformer.
Choosing The Right Transformer
First, select a transformer that matches your lighting needs. Check the total wattage of your LED lights. Your transformer should handle this wattage. Allow for some extra capacity. This prevents overloading. Look for transformers with built-in timers or photocells. These features add convenience.
Mounting The Transformer
Choose a location near a power outlet. The spot should be accessible but out of direct weather exposure. Attach the transformer to a wall or other solid surface. Use screws and wall anchors for secure mounting. Ensure the transformer is at least one foot above the ground. This helps protect it from water damage.
Once mounted, plug the transformer into the outlet. Secure the power cord to avoid tripping hazards. Your transformer is now ready for connecting the low voltage wires.
Laying Out And Connecting The Cables
Installing low voltage LED outdoor lighting can transform your garden. It enhances beauty and safety. In this section, we will cover the steps for laying out and connecting the cables. This ensures your lighting system works efficiently.
Running The Low Voltage Cables
First, plan your cable layout. Draw a simple map of your garden. Mark where each light will be placed. This helps in estimating the cable length needed.
Next, run the cables from the power source to each light. Use a trenching tool to bury the cables. Keep the cables at least 6 inches deep. This protects them from damage.
Tip: Avoid sharp turns. They can damage the cables. Use gentle curves instead.
Connecting The Lights To The Cables
Now it’s time to connect the lights. Strip the cable ends to expose the wires. Use wire connectors to attach the lights to the cables.
Follow these steps:
- Place a connector on the cable.
- Insert the light’s wires into the connector.
- Secure the connection by tightening the connector.
Repeat this process for each light. Ensure all connections are tight to avoid loose connections.
Once all lights are connected, test the system. Switch on the power. Check each light to ensure it works.
Testing And Final Adjustments
Testing and Final Adjustments are crucial steps in the installation of low voltage LED outdoor lighting. After setting up your lights, it is important to test and adjust them to ensure they work perfectly and create the desired effect. This process involves verifying the functionality of the lighting system and fine-tuning the positions of the lights.
Testing The Lighting System
Begin by turning on the entire lighting system. Check each light to make sure it illuminates correctly. If any light fails to turn on, troubleshoot the connections and power sources. Ensure all wires are properly connected and secure.
Use a multimeter to check the voltage at different points. This helps to ensure the electrical flow is consistent. The voltage should be within the range recommended by the LED manufacturer.
Next, observe the lights at night. This will give a true picture of their effect. Make sure there are no flickering or dimming issues. Address any problems immediately to maintain the integrity of your lighting setup.
Adjusting Light Positions
Once all lights are working, it is time to adjust their positions. Move each light to its optimal spot to achieve the desired lighting effect. This may involve tilting or rotating the fixtures.
Consider the following adjustments:
- Angle: Tilt the lights to highlight specific features like trees or pathways.
- Height: Adjust the height to control the spread of light.
- Direction: Rotate the lights to avoid unwanted shadows or glare.
After making adjustments, step back and review the overall lighting scheme. Make sure it enhances the landscape without being too harsh or too dim. Fine-tuning may be needed to achieve the best effect.
Finally, secure the lights in their new positions. This ensures they remain stable and continue to perform well over time.

Credit: www.amazon.com
Credit: www.fxl.com
Frequently Asked Questions
What Tools Do I Need To Install Low Voltage Led Outdoor Lighting?
You need wire strippers, a shovel, a screwdriver, and a voltage tester.
How Deep Should I Bury The Low Voltage Cable?
Bury the cable at least 6 inches deep to protect it from damage.
Can I Install Low Voltage Led Lights Myself?
Yes, with basic tools and instructions, you can install them yourself.
How Do I Connect The Lights To The Transformer?
Connect the wires from the lights to the transformer terminals.
What Is The Best Location For Led Outdoor Lights?
Place lights along pathways, near plants, and around outdoor features.
Conclusion
Installing low voltage LED outdoor lighting is simple and rewarding. It enhances your yard’s appearance. Plus, it improves safety at night. Follow the steps carefully for best results. Choose the right lights for your needs. Connect them securely to a power source.
Enjoy your beautifully lit outdoor space. Start your project today and transform your yard. With these easy tips, anyone can do it. Happy lighting!

My name is Mahi Uddin, and I’m a blog writer with over two years of experience specializing in creating engaging, informative content using AI tools. I contribute to InExDecor.com, where I share creative ideas and practical tips for transforming interior and exterior spaces into beautiful, functional environments. With a passion for storytelling and a knack for blending creativity with technology, I strive to craft blogs that not only inform but also inspire readers. When I’m not writing, you can find me exploring design trends or enjoying a good book with a cup of coffee.