Is your solar light not working? Don’t worry, fixing it is simple.
Solar lights can stop working for many reasons. Solar lights are a great addition to any outdoor space. They provide light without increasing your electricity bill. Sometimes, these lights can fail. This can be frustrating, especially if you rely on them for safety or decoration.
The good news is that many common issues can be fixed at home. From dirty solar panels to faulty batteries, solutions are often straightforward. In this guide, you’ll learn how to diagnose and fix your solar lights. With a few tools and a little time, you can get your solar lights shining bright again. Ready to dive in? Let’s get started.
How to Fix Solar Lights: 8 Simple Solutions
1. Troubleshooting Basics
Some simple troubleshooting can help if your solar or battery powered device seems not to be working as expected.
Inspect for Dirt or Debris
- Dirt, dust or debris on the panels can decrease efficiency.
- Gently rub the surface using a soft cloth or soft brush.
- Make sure that the panels get direct sunlight — even partial shading can impact performance.
Check for Damage
- Check the panels for cracks or physical damage.
- A broken panel might render your system ineffective and must be changed.
Verify Battery Condition
- Ensure that the battery is fully charged.
- There can be a dead or weak battery if the device is not working.
- Install new batteries of the right type (rechargeable batteries tend to work best).
Inspect Battery Terminals
- Inspect the battery terminals for corrosion.
- Use a dry cloth or small brush to carefully clean any corrosion.
- Make sure the batteries are facing the correct way according to the + / – markings.
2. Fixing Solar Lights: Clean The Solar Panels
Solar panels can accumulate dirt and debris over time which blocks sunlight and lowers efficiency. Regularly cleaning them to make sure the charging and performance is efficient. Fixing solar lights often involves cleaning the solar panels. Dirt and debris can block sunlight. Clean panels ensure efficient charging.
Tools Needed
For this, you should get the following items:
✔ Soft cloth or sponge — This will help to avoid scratches on the panel surface.
✔ Bucket full of warm water – To help loosen dirt.
✔ Mild soap – Cleaning that is not aggressive to the panels.
✔ Small brush – For scraping off stubborn dirt or debris.
✔ Hose (optional) – Useful for rinsing.
✔ Clean, dry cloth – To dry the panels after cleaning.
⚠ Never use harsh chemicals or abrasive tools, which can scratch the panels.
Step-by-step Guide
1️⃣ Turn Off the Solar Lights
Safety first! Before cleaning, ALWAYS turn off the solar lights.
2️⃣ Remove Large Debris
You can use your hands to remove leaves, twigs, or other debris.
3️⃣ Get the cleaning solution ready
Combine warm water and a couple drops of mild soap.
4️⃣ Gently Clean the Panels
Immerse a soft cloth or sponge into the soapy water.
Carefully wipe the panels to remove dust and dirt.
Never scrub so hard that you get scratches.
5️⃣ Rinse Thoroughly
Flush off soap with a clean water.
You may find a hose handy for this step.
6️⃣ Dry the Panels
Wipe the panels with a clean, dry cloth to avoid water spots.
3. Replacing Batteries in Solar Lights
Replacing batteries is a simple way to fix solar lights. Open the battery compartment, remove old batteries, and insert new ones. This often restores full functionality.
One of the easiest and most effective ways to fix solar lights is to replace the batteries that power them. As batteries age, their ability to hold a charge decreases, which is why replacing them is necessary for peak performance.
Types Of Batteries
Solar lights often use rechargeable batteries. The most common types are NiMH and NiCd. NiMH batteries are more modern and hold a charge longer. NiCd batteries are older but still work well. Always check which type your solar light needs. This ensures you buy the right replacement.
Most solar lights use one of two broad types of rechargeable battery types:
✔ NiMH (Nickel-Metal Hydride) – A newer type that retains charge longer and is friendlier to the environment.
✔ NiCd (Nickel-Cadmium) – Another vintage type, reliable, but with a shorter lifespan and potential memory effect.
⚠ Remember to check the type and size of the battery needed by your solar light before you buy a replacement.
Installation Process
1️⃣ Find the Battery Compartment
Solar lights are usually available in the back or bottom.
2️⃣ Open the Compartment
If need be, use a small screwdriver to pop the cover off.
3️⃣ Remove the Old Batteries
Remove the old batteries and recycle them in accordance with local recycling regulations.
4️⃣ Insert the New Batteries
Match the positive (+) and negative (-) terminals to the markings in the compartment.
Ensure they fit securely.
5️⃣ Close the Compartment
Ensure the cover is snug to keep out moisture and dust.
6️⃣ Position the Solar Light
Position the light in direct sunlight so that the new batteries charge completely.
Once you make sure of these, your solar lights should work fine again.
Want some more trouble tips for solar lights that fail to function even after replacing battery? 🔋☀️

Credit: www.condoblues.com
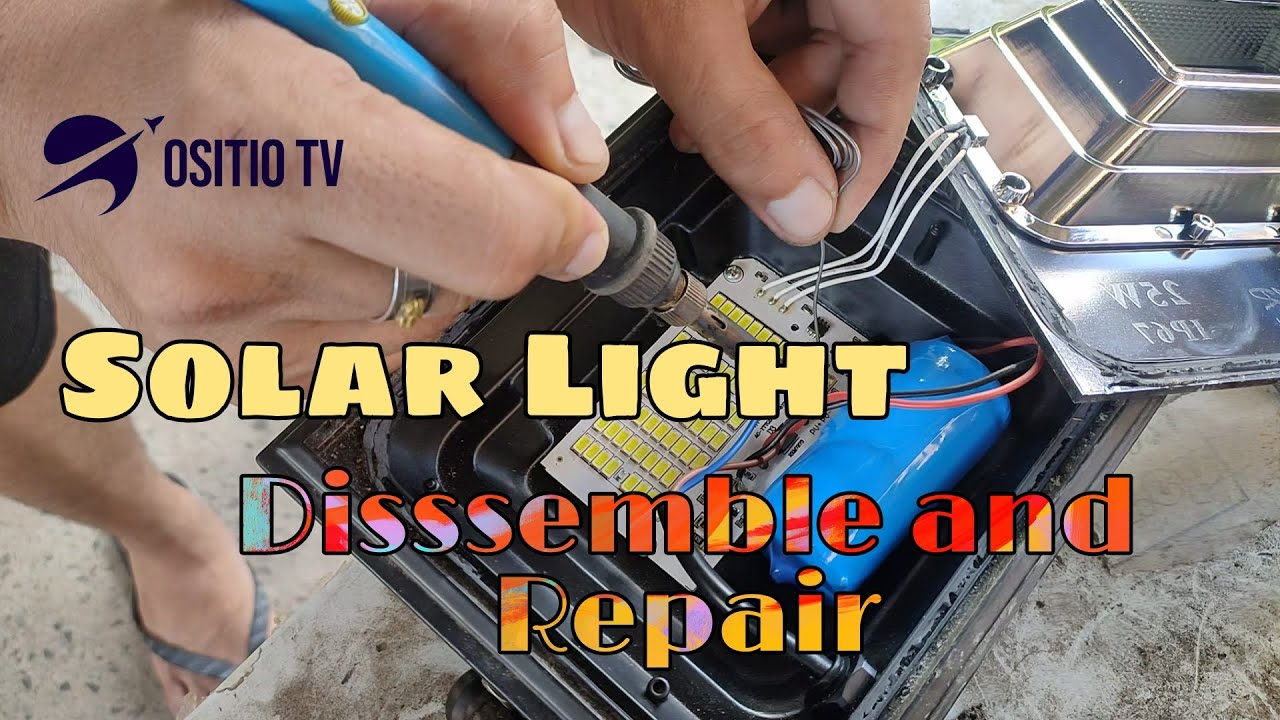
4. Repairs of Wiring Problems in Solar Light
Defective or loosened wiring can make solar lights to malfunction. These problems are often solved easily by checking and repairing wiring connections.
1. Check All Connections
- Check that all wire connections are fully engaged.
- Then, if you see any loose wires, tighten them with pliers.
- If a wire is loose or disconnected, it interrupts power flow and prevents the light from working.
2. Inspect for Wire Damage
- Inspect for cuts, frays or breaks in the wiring.
- Wires that are damaged must be repaired in order to be able to use them again.
Repairing Broken Wires
If you discover a broken wire, here’s how to fix it:
1️⃣ Strip the Wire Ends
- Strip a bit of insulation off both ends of the broken wire using wire strippers or a small knife.
2️⃣ Twist the Wires Together
- Twist tightly the exposed wire ends together for a strong connection.
3️⃣ Go over with Electrical Tape
- Use electrical tape to insulate and protect the connection from moisture and damage.
- Important: Do not allow open wire remain bare for any duration.
If you have kept the wiring properly secured and repaired, your solar lights will work efficiently and without fault.
Would you like tips to troubleshoot other popular solar light issues? 🔧💡
Inspect wires for any damage. If a wire is broken, it needs repair. Strip the ends of the wire. Twist them together. Use electrical tape to cover the twist. This will make the wire safe again. Ensure there are no exposed parts. Safe wires mean working lights.
5. Addressing Sensor Problems in Solar Lights
Solar lights work based on the sensor they use, which essentially drives their on-off operations. If the light is not working as it should, inspecting the sensor helps you find the problem.
Test the Sensor
- Hand over sensor. When the light goes on, the sensor is working.
- Remove your hand. The light should turn off.
- If the light does not react, the sensor is likely bad or out of adjustment.
Adjust the Sensitivity
Find the sensitivity dial on the light.
- Make small adjustments by turning the dial and test the light after each adjustment.
- ✔ If the light is overly sensitive, dial it back.
- ✔ If the dial doesn’t pick up on motion well, increase it.
- Continue adjusting until the sensor serves you at the level you want.
Replacing a Faulty Sensor
- If the sensor does not respond, it might be dead and should be replaced.
- Consult the manufacturer’s instructions for the correct part to replace.
- Make sure that the new sensor is properly installed and aligned for optimal performance.
This will ensure that your solar lights are working as they should, simply by testing and modifying the sensor.
Credit: www.dalighting.com
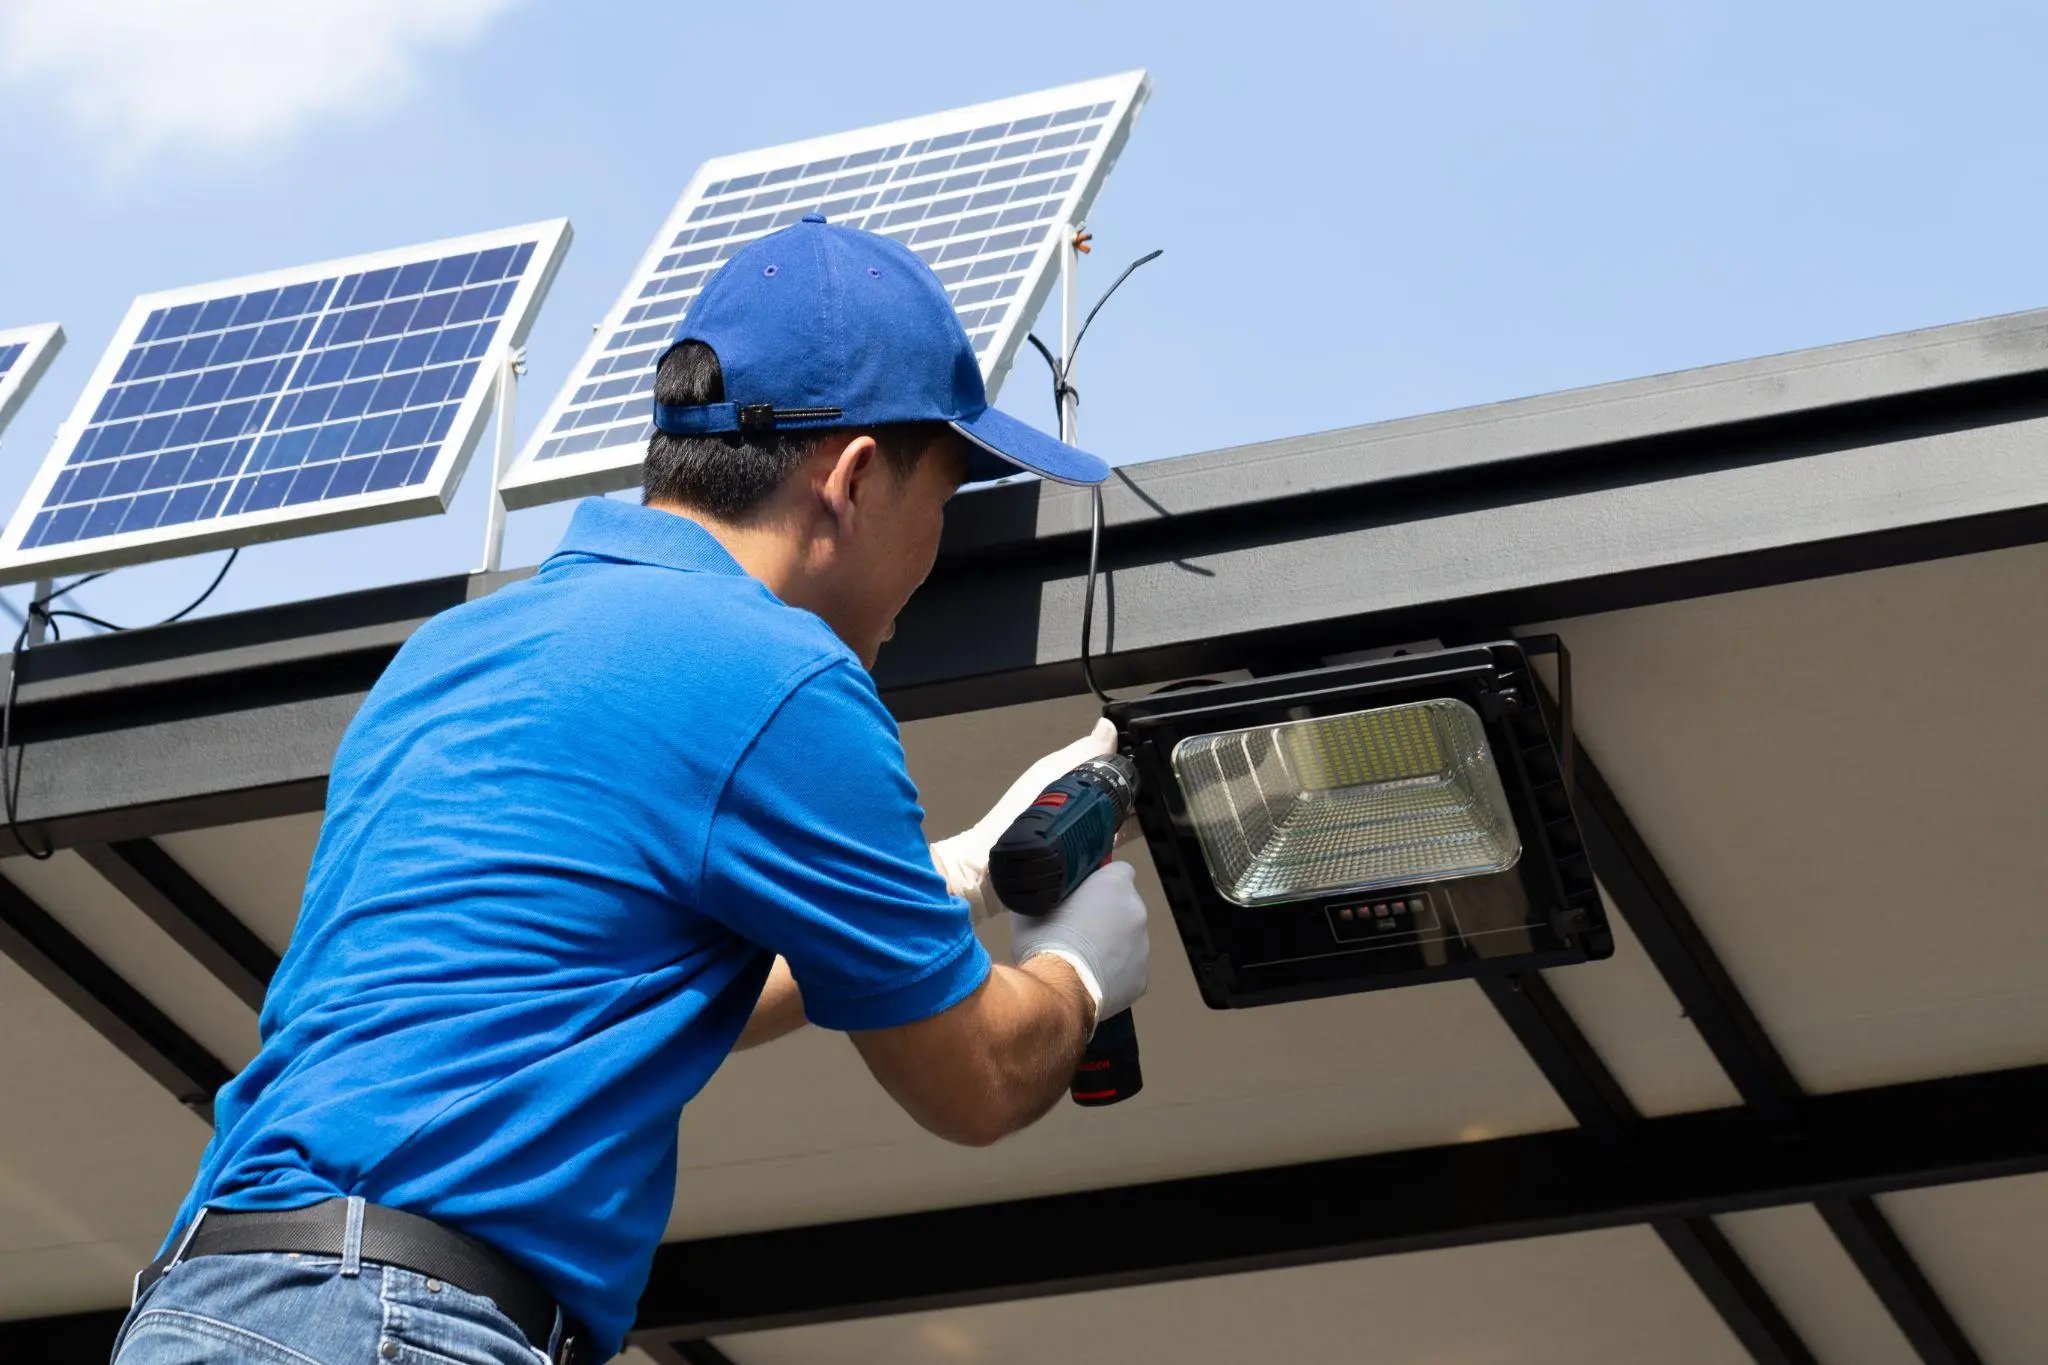
6. Ensuring Proper Placement of Solar Lights
Position solar lights where they can get plenty of sunlight during the day. Ensure they are not blocked by trees or buildings. This helps them stay bright all night.
Optimal Sunlight Exposure
- At first, put lights out in direct sunlight so that they can charge completely.
- Stay away from shaded areas — trees, buildings or fences can block sunlight and reduce efficiency.
- Make sure that there are no shadows on the panels all day long
- Sunshine = full battery = bright lights at night
Avoiding Obstructions
- Clear any objects that may block sunlight on the solar panel.
- Clippable tall plants or bushes may block the sunshine on your panel.
- Keep the panel clean — dust, dirt or leaves can interfere with effective charging.
- This will need a wipe down every so often to keep it clean and run efficiently, just use a damp cloth.
So, you need to make sure installation in the right place and no object shade to the solar panel.
7. Weather-related Solutions
Fixing solar lights is easy. Check the solar panel for dirt and clean it. Replace old batteries with new ones for better performance.
Handling Snow And Ice
Snow and ice can block solar panels. Clean snow off the panels gently. Use a soft cloth or brush. Never use sharp tools. Ice can also damage solar lights. Try warm water to melt the ice. Be careful to not damage the lights. Dry the lights after removing ice.
Protecting From Rain
Rain can affect solar lights. Check if the lights are waterproof. If not, cover them during heavy rain. Use plastic bags or waterproof covers. Store solar lights indoors during storms. This keeps them safe from water damage.
8. Upgrading Components
Switching to better panels can improve your solar lights. Look for high-efficiency solar panels. These panels capture more sunlight. This means more power for your lights. Durable panels last longer. Consider weather-resistant options. They work well in harsh conditions. Choose panels with high wattage. More wattage means brighter lights.
Efficient LEDs save power. They last longer than regular bulbs. Choose LEDs with high lumens. More lumens mean brighter lights. Look for energy-saving features. Some LEDs use less power but shine bright. Color temperature matters too. Cool white LEDs are brighter. Warm white LEDs give a cozy glow. Pick the one that fits your needs.

Credit: www.youtube.com
Frequently Asked Questions
Why Are My Solar Lights Not Working?
There could be several reasons. First, check if the solar panel is clean. Then, ensure the battery is fully charged. Finally, inspect the wiring for any damage.
How Do I Clean Solar Panels?
To clean solar panels, use a soft cloth or sponge. Gently wipe the surface with water and mild soap. Avoid using abrasive materials.
Can Solar Lights Work In Winter?
Yes, solar lights can work in winter. However, their efficiency may decrease. Ensure the panels receive enough sunlight during the day.
How Do I Replace A Solar Light Battery?
To replace a solar light battery, open the battery compartment. Remove the old battery and insert a new, compatible one. Ensure it is properly seated.
Conclusion
Fixing solar lights is easier than it seems. Follow the steps carefully. Check connections, clean panels, and replace batteries if needed. Simple maintenance keeps them shining. Regular checks help avoid future issues. Now, your solar lights can brighten your nights again.
Happy lighting!

My name is Mahi Uddin, and I’m a blog writer with over two years of experience specializing in creating engaging, informative content using AI tools. I contribute to InExDecor.com, where I share creative ideas and practical tips for transforming interior and exterior spaces into beautiful, functional environments. With a passion for storytelling and a knack for blending creativity with technology, I strive to craft blogs that not only inform but also inspire readers. When I’m not writing, you can find me exploring design trends or enjoying a good book with a cup of coffee.