Installing outdoor lighting might seem tricky. But it’s easier than you think.
Outdoor lighting can transform your home’s exterior. It adds beauty, safety, and functionality. Whether you want to light up a garden path, highlight your landscaping, or increase security, installing outdoor lighting is a great project. With the right tools and a bit of planning, you can do it yourself.
In this guide, we’ll walk you through the steps. You’ll learn how to choose the right lights, plan your layout, and install the fixtures. By the end, you’ll have a well-lit outdoor space that enhances your home’s appeal. Let’s get started and brighten up your outdoors!
Credit: ecoactions.homedepot.com
How Do You Install Outdoor Lighting: A 7-Step Guide
1. Planning Your Outdoor Lighting
Creating a well-lit outdoor space enhances your home’s safety and beauty. Effective planning ensures that your outdoor lighting meets your needs and complements your landscape. Begin by evaluating your space and selecting suitable lighting fixtures. Follow these steps to ensure a successful installation.
Assess The Area
Start by observing your outdoor space during different times of the day. Identify areas that need illumination, such as pathways, patios, or garden features. Note any dark spots that could pose safety risks. Consider the function of each area. Do you need task lighting for cooking or ambient lighting for relaxation? Make a list of all the spots requiring light.
Choose The Right Fixtures
Select fixtures that match the purpose and style of your outdoor space. For pathways, use stake lights or bollard lights. Wall-mounted fixtures work well for patios and decks. Spotlights can highlight specific features like trees or sculptures. Ensure that your fixtures are weather-resistant and suitable for outdoor use. Think about the color and brightness of the light. Warm white lights create a cozy atmosphere, while bright lights improve visibility.
2. Gathering Necessary Tools
Installing outdoor lighting can transform your backyard into a beautiful space. But before you start, you need the right tools. Having the right tools ensures a smooth installation process. Below, you will find a comprehensive guide to gathering the necessary tools.
Essential Tools List
Here is a list of essential tools you will need:
- Screwdrivers – Both flathead and Phillips
- Wire Cutters – For cutting wires to the right length
- Wire Strippers – To remove the insulation from the wires
- Voltage Tester – Ensures the power is off before you start working
- Drill – For making holes if necessary
- Measuring Tape – To measure distances accurately
- Electrical Tape – For securing connections
Safety Gear
Safety should always come first. Here is a list of safety gear you will need:
- Safety Glasses – Protects your eyes from debris
- Gloves – Keeps your hands safe from cuts and electric shocks
- Insulated Tools – Reduces the risk of electric shock
Using the right tools and safety gear makes your work easier and safer. Always double-check your tools before starting the installation. This ensures you have everything you need for a successful project.
3. Preparing The Installation Site
Preparing the installation site is crucial for a successful outdoor lighting project. This step ensures that the lights are placed safely and effectively. Proper preparation can prevent issues and enhance the visual appeal of your outdoor space.
Clear The Area
First, remove any debris or obstacles from the installation site. This includes rocks, leaves, and branches. Clearing the area makes it easier to work and reduces the risk of accidents. Check for any underground utilities. Call your local utility company if you’re unsure. Safety is the top priority.
Mark The Locations
Decide where you want the lights to be placed. Use stakes or flags to mark these spots. This helps visualize the final layout and ensures even spacing. Measure the distance between each light. Consistent spacing provides a balanced look.
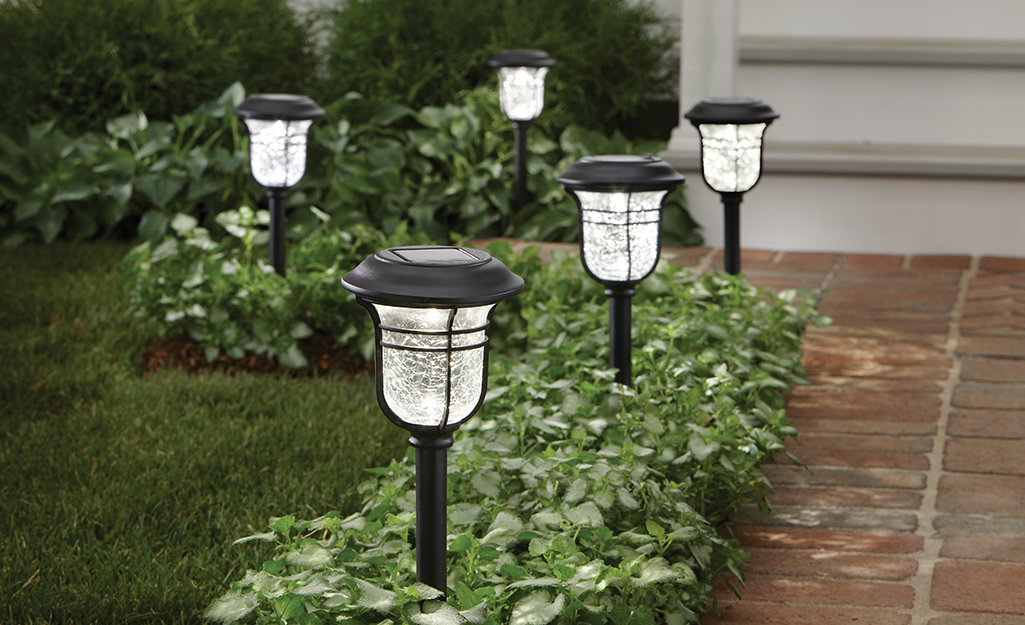
Consider the power source. Ensure your lights can reach it. If using solar lights, place them where they receive plenty of sunlight. Proper placement enhances functionality and aesthetics.
4. Installing Electrical Components
Installing outdoor lighting involves more than just placing lights. The right electrical components ensure safety and functionality. This guide will help you understand the steps involved in installing the electrical components of your outdoor lighting system.
Run The Wiring
Running the wiring is a crucial step. Start by planning the path for your wires. Use a direct burial cable for outdoor use. This cable is designed to withstand the elements.
First, dig a trench to bury the cable. Make sure the trench is at least 18 inches deep. This depth protects the cable from damage. Lay the cable in the trench, and cover it with soil.
Next, connect the cable to your power source. This can be an existing outdoor outlet or a dedicated circuit. Use waterproof connectors to prevent moisture from entering the connections.
Install The Switches
Installing switches allows you to control your outdoor lighting easily. Choose a location for your switch that is accessible and dry. An outdoor-rated switch is necessary for safety.
First, turn off the power to the circuit you are working on. This is crucial to avoid any electrical hazards. Next, connect the wires from your lighting circuit to the switch. Follow the manufacturer’s instructions for wiring the switch.
Once the switch is wired, mount it in a weatherproof box. This box protects the switch from the elements. Finally, turn the power back on and test your switch to ensure it works correctly.
By following these steps, you can safely install the electrical components for your outdoor lighting. Proper installation ensures your lighting system is both functional and safe.
5. Mounting The Light Fixtures
Installing outdoor lighting enhances your home’s curb appeal and safety.
Mounting the light fixtures correctly is crucial for a successful installation.
Follow these steps to ensure your lights are secure and functional.
Attach The Lights
Start by attaching the lights to the mounting brackets.
Make sure the brackets are aligned with the fixture’s mounting holes.
Use a screwdriver to tighten the screws securely.
Check that the fixture is level.
An uneven fixture can affect the light distribution.
You may need a spirit level to ensure accuracy.
- Align the brackets with the mounting holes.
- Tighten the screws using a screwdriver.
- Ensure the fixture is level.
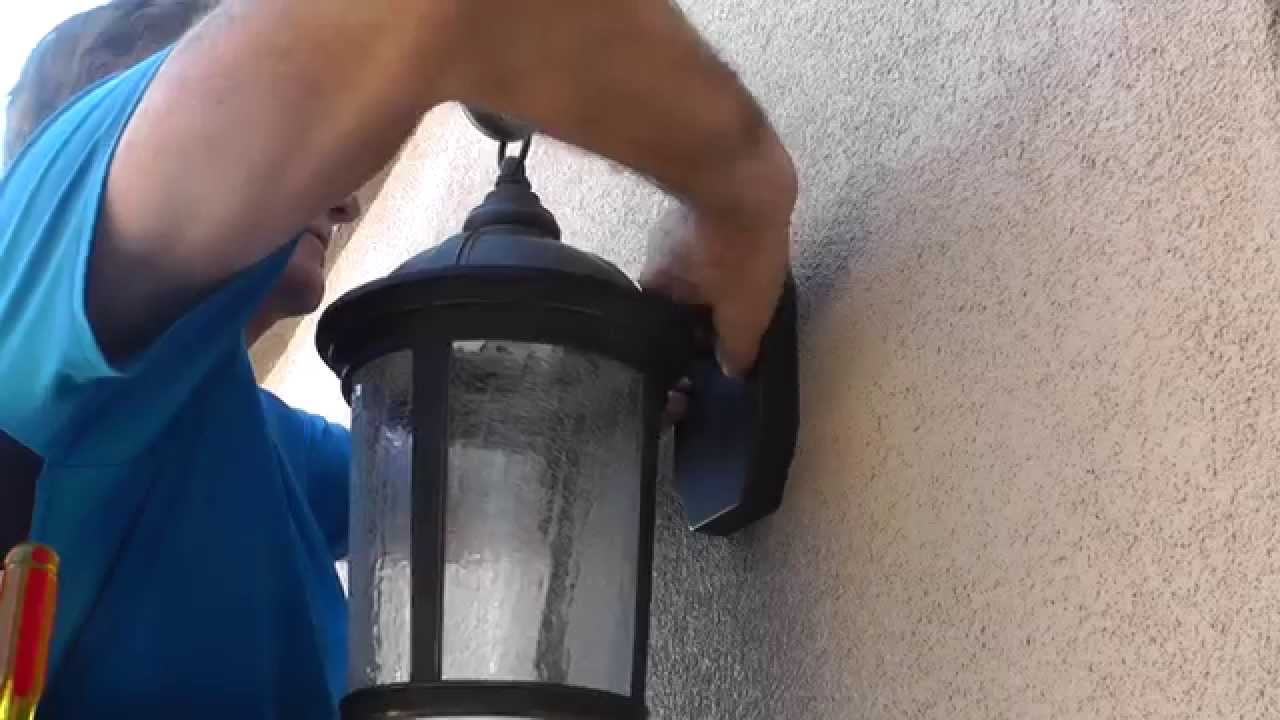
Secure Fixtures
Once the lights are attached, secure the fixtures to the wall or post.
Use the appropriate anchors and screws for your surface type.
If mounting on brick or concrete, use masonry anchors.
For wood surfaces, regular wood screws will suffice.
- Choose the correct anchors for your surface.
- Drill holes if necessary.
- Screw the fixtures into place.
After securing the fixtures, check their stability.
They should not wobble or move.
A secure fixture ensures long-term durability and safety.
By following these steps, you can confidently mount your outdoor light fixtures.
Enjoy the improved visibility and aesthetic appeal of your well-lit space!

Credit: www.youtube.com
6. Connecting The Power
Connecting the power is a crucial step in installing outdoor lighting. Proper connections ensure your lights work safely and efficiently. In this section, we’ll guide you through the process.
Test The Connections
After connecting the wires, you must test the connections. This step ensures that everything is set up correctly. Use a voltage tester to check if the power is flowing through the wires. Follow these steps:
- Turn off the power at the main circuit breaker.
- Connect the voltage tester to the wires.
- Turn the power back on.
- Check the voltage reading on the tester.
If the reading is correct, your connections are successful. If not, double-check your wiring.
Ensure Proper Functioning
Once your connections are tested, ensure the proper functioning of the lights. Turn on the lights and observe their performance. Here are a few things to look for:
- All lights should turn on.
- No flickering or dimming should occur.
- Lights should be evenly lit.
If you notice any issues, inspect the connections again. Loose connections can cause problems. Tighten any loose wires and test again. Your outdoor lighting should now be ready to enhance your space.
7. Final Touches And Maintenance
Final touches and maintenance are crucial steps in installing outdoor lighting. These steps ensure everything runs smoothly and lasts longer. Proper adjustments and regular care keep your lights shining bright. Let’s dive into the details.
Adjust Light Angles
After installing your outdoor lights, check the angles. Make sure the light covers the desired area. Adjust the fixtures to avoid shadows and dark spots. This helps in illuminating pathways and enhancing security.
Use a ladder if needed. Test the lights at night. Small adjustments make a big difference. Aim for balanced and even lighting.
Regular Maintenance Tips
Outdoor lights face harsh weather. Regular maintenance keeps them in good shape. Clean the fixtures every few months. Dust and dirt reduce brightness.
Check for any loose connections. Tighten screws and bolts. Replace burnt-out bulbs promptly. Inspect wires for wear and tear. This prevents short circuits and ensures safety.
Trim plants and bushes around the lights. This prevents shadows and allows clear light passage. Regular checks extend the lifespan of your lights. They keep your outdoor space well-lit and welcoming.

Credit: www.chatfieldcourt.com
Frequently Asked Questions
What Tools Do You Need To Install Outdoor Lighting?
You need a drill, screwdriver, wire strippers, and a ladder. Safety gloves are also recommended.
Can You Install Outdoor Lighting Yourself?
Yes, you can. Follow safety guidelines and the manufacturer’s instructions. Always ensure the power is off before starting.
How Do You Choose The Best Location For Outdoor Lights?
Consider areas that need illumination. Pathways, entrances, and dark spots are good choices. Avoid placing lights too close to each other.
What Type Of Outdoor Lighting Is Best For Security?
Motion sensor lights are best for security. They turn on when movement is detected, deterring intruders.
How Do You Maintain Outdoor Lighting?
Regularly check for damages. Clean fixtures to remove dirt and debris. Replace burnt-out bulbs promptly.
Conclusion
Outdoor lighting installation can transform your space. It adds safety and beauty. Just follow the steps we discussed. Plan your layout, choose quality fixtures, and ensure proper wiring. Always prioritize safety. Enjoy the new ambiance in your yard. Now, your evenings can be brighter and more inviting.
Happy lighting!

My name is Mahi Uddin, and I’m a blog writer with over two years of experience specializing in creating engaging, informative content using AI tools. I contribute to InExDecor.com, where I share creative ideas and practical tips for transforming interior and exterior spaces into beautiful, functional environments. With a passion for storytelling and a knack for blending creativity with technology, I strive to craft blogs that not only inform but also inspire readers. When I’m not writing, you can find me exploring design trends or enjoying a good book with a cup of coffee.